Wednesday, December 14, 2016

Ottobre dress 02/2016 15 Pieced linen dress

I had a piece of crinkled linen left over from when I made my Tessuti Eva dress.  It was expensive fabric and so lovely I have been waiting for the right pattern to come along to use it.

Enter Ottobre 02/2016 #15  Pieced linen dress which required crinkled linen and I had the right amount... big win!  I didn't think I would get a dress out of the remnant piece but as this is cut into many pieces it worked really well.


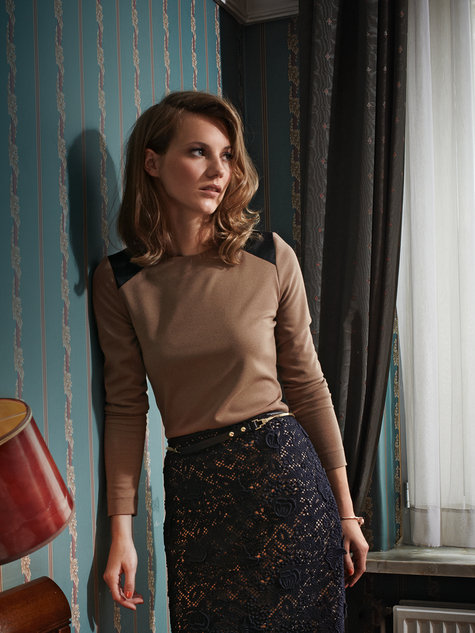
I really like top stitching and used the same thread as I used for sewing the dress but with a triple stitch to look like a top stitch.

The colour is out in this pic.  The next pic is more accurate.
It is hard to see the details in this photo but I love this dress... it also has pockets... pocket love!


Did you spot my necklace?  I have always coveted this necklace and there is a tutorial on the Ottobre blog to make it, but I don't have any of the jewellery making equipment so wasn't inclined to try.  However since entering the world of Etsy selling I discovered there are talented makers out there who will make custom orders for you.  I contacted Anita of Echidna Arts and Cards and she made me a beautiful version in gold leather.

I have worn this dress quite a bit since I made it and love it enough that I am making another version from a linen print.  I have reviewed the pattern here.

... and speaking of Etsy, I have recently started a destash section in my shop and have listed one remnant of supplex.  It is not large enough to make a whole piece of clothing, but if you are after some supplex to use in a colour blocked piece, this could work for you... check it out here


I will be adding to the destash section over time, so there may be something there to appeal to a fellow sewist so keep an eye out.

Ciao kittens... back soon with a cool tunic!

Tuesday, November 8, 2016

Active wear.... Kwik Sew 4181

Sorry I am a very intermittent blogger lately.  We have had a week away on a camping holiday and you know how it is... stuff.

Anyhoo, I have finally got around to showing you my new Kwik Sew top 4181.  


I have made View B, pretty much straight from the pattern.  The only adjustment I made was to grade out to a larger size at the hips.

The fabric I have used is supplex for the royal blue parts and black back and bindings and the contrast V is a funkifabrics purchase called Pompeii Ice.  This was an easy sew.  The part I had the most difficulty with was sewing the applique neatly.  This was more related to the type of fabric than the pattern.  The funkifabrics fabric is called flex and is like a swimsuit fabric so was a little tricky to turn under.  From memory I think I tried basting glue and it didn't really work, but I got there in the end.


Pretty happy with the fit and finish of this pattern.  I didn't bother with the shelf bra but wear it with a racer back sports bra and like how the back covers the bra straps.


Other than that I have been sewing for my etsy shop... a few new bags, including this one from an OOP Alexander Henry fabric....


and some new headbands...


Hope you are all having fun with your sewing... Ciao kittens!

Sunday, October 9, 2016

More Ottobres Faded Stripes tees 02/2015 #17

Just a quick show and tell post... or should I say another one. :) 

My lifestyle dictates casual clothes most of the time and one of my fave tee patterns has been Ottobre 02/2015-17.  Made twice before for last summer and worn to death... in black here.... and in green here.  I love the simple styling of this top with shoulder details.  

In the past I made them in drapey rayon and love them but thought maybe I should size down a bit.  So for coming into this summer I had a cotton jersey bought at 40% off a few years ago from Lincraft and I decided to size down... Bo...Booow!  Silly mistake.  Of course in a different, more sturdy fabric the fit was quite different.  It is a tad small.  I can feel it in the arms and you can see it across the bust, but not so uncomfortable that I hope to be able get wear out of it this summer.


I have also been religiously patting a beautiful viscose piece I bought from Knitwit in the last year.  A viscose print from Italy.  I so loved this fabric and planned a 3/4 sleeved  New Look 6150  from it.   Then I got the flu which morphed onto Strep throat and I was out of it for ages (one reason I haven't blogged so much lately).  My lovely rescue dog Champ felt a little neglected during this time and expressed it by "loving" my favorite piece of fabric...


I had trouble looking at him for a day or two, but took a deep breath and washed the bit of fabric I had left and spent ages trying to lay it out to cut another Ottobre top from it (sans holes)


So another Ottobre tee was born and I love it.


and the back...


I am so hoping I had found all the holes in the fabric and none will form on wearing, but if I get a couple of wears I will feel happier than throwing this gorgeous piece of fabric out.

At least he has shown a very fine taste in fabrics... Ciao kittens an active wear top up next...

Sunday, September 18, 2016

Gift sewing and introducing SusySewandSew

My friends and acquaintances seem to be having a bunch of babies lately (whats the group term for a bunch of babies - a nappy?) so I needed to make some more bibs as gifts.  The Nicole Mallalieau bib pattern I have used in this past is a good one, but I wanted a pattern that I could applique some designs on to so that I could use more "plain" fabrics up from my stash.  After a little hunting I found this pattern on Etsy - preciouspatterns bib pattern.

It makes for such a cute bib!  Total cuteness overload.  This is the bib I made for my hairdresser who is going on maternity leave soon.  She has a Rottweiler dog so I am hoping she likes it. 


Well these suckers are addictive and I could not stop at one... I made five more.  I even altered the applique pattern to make a Christmas bib of Rudolph the red nosed reindeer.


Well this is all lead up to formally tell you that I have opened an etsy shop, so if you love these bibs but don't want to sew your own, you can check out my shop in the side bar.

I mainly opened the shop to sell my fitness headbands.  I have been making these for myself and selling some to the ladies at my gym.  People have been coming back for more so I thought, they must be okay, so decided to start selling them to a wider audience.


I also have some coin purses and will be adding different bits and bobs over time.  At the moment I only post within Australia but am willing to post elsewhere if there is interest. Please message me if this is the case.

To finish a picture from my garden as we come into Spring here....


Ciao for now, kittens...

Sunday, September 11, 2016

Sewing along with the Sewing Bee - Ottobre 02-2011-10 Capris

I have been a very quiet blogger lately, but it has been a bad winter and I am just getting over a very bad bout of flu which ended up as Strep Throat.  I still have a bit of a cough and my energy levels are non-existent, but I am getting a bit better everyday.  

So a lot of sitting and planning sewing has happened and very little actual sewing.  I did get a little inspired by the Pattern Review Sewing Bee and thought I might enter, but my energy levels did not match my enthusiasm so I didn't get my entry finished in time, but it has inspired me to make some capris. 

So far I have a muslin made from the Ottobre pattern 02-2011-10.  


The muslin fabric is similar in stretch to the fabric I want to use and is a little lighter in weight, and is one of those... what was I thinking fabrics!   So, you know about perfect for a muslin!


I took so long to make these as I really am not a fan of making pants and I have never found a fly tutorial that is really simple to understand... until now!  I used the instructions found in the Palmer Pletsch "Pants for Real People" book.  I will follow the instructions again when I make my real pair and I think it will be my go-to fly instructions now.

What do you think of the leg length?  Should I make the next pair a little shorter?
The boo-boo I made on these pants was to trim off the underlap in line with the edge of the fly... so I did not have enough overlap to sew a button/buttonhole to the waistband... duh!  I obviously don't do flys/waistbands often enough!  I have just sewn a hook and eye to hold the waistband together.  It has been noted in my pattern now, so hopefully I won't do that again next time.


I am very happy with the fit of these pants.  I thought I might need to add some fabric to the inside leg front as they felt a little tight when I first put them on, but on wearing them the fabric has relaxed enough that I don't think that it is an issue. 


 So this pair look a little grandma's sofa cover, but I think I will wear them a little this summer just to make use of the muslin.  My "real" pair are going to made in a camel/tan fabric that I think will work into my wardrobe really well.

Ciao kittens... hopefully back to regular blogging now...

Friday, August 5, 2016

Burdastyle 10-2012-118A... Wedding season

We have two of the younger members of out family getting married this year and in our winter time. When I started to think about what I would like to wear, my first thought was a dressy lace dress, or a fitted sheath in a glamorous fabric or even a pretty 50's style dress with a large skirt, but when I really thought about it I decided my real priorities were to make a dress that would be:
  1. comfortable - weddings take time these days with there often being quite a break between the ceremony and the reception.
  2. warm enough to wear on a cool day with maybe a cool breeze - that meant some shoulder/arm coverage
  3. able to be used again... I really don't need another formal frock hanging in the wardrobe after being worn only once and
  4. suitable for the occasion.
I think I am getting too practical perhaps in my dotage...

This Burdastyle dress (10-2012-118A) has been very popular and I have been wanting to make it since seeing all the great versions out there but sometimes you need the occasion and I decided this was it.  To go with point 1 - comfortable - I decided to make it in a beautiful, soft ponte that I purchased from Knitwit.  In actual fact, I already had the fabric with this pattern in mind.  I had ordered it after seeing the samples at a recent Craft Show.

I love the pic of this dress in front of the stone wall that reflects the colours.
I did leave it until the last minute to make it, so didn't have time to muslin the dress, but I checked the tissue fit and decided to do a broad back adjustment and increase the bicep width.  Then I cut the dress with 1" (2.5cm) seams to give me some adjustment room, but ended up not needing it.  I basted the seams initially and adjusted the back darts and got a really nice fit over my back.  I did try to get a photo to show you but I was not "properly" side on in any of the shots so this is the best I can show you so you will have to use your imagination!  At least you can see the gather detail on one side.


I did leave the zip out as I could easily pull this dress on when it was made of the ponte.  Which was a shame really as I had bought a beautifully matching zip, but I figured I was in enough of a hurry to keep it as simple as possible.

I was wondering if I widened the back a little too much?  I like the fit through the body, but the neckline seems a little too wide and perhaps at the back armhole seam?  I wonder if I should have cut the shoulders at a size down?  All the fit issues I am still trying to understand?


The only other adjustment was to reduce the sleeve and hem length by the hem allowance.

I did spend quite a bit of time to lay out the pattern so that I made best use of the interesting print in the fabric.


Oh and I tried a new tip out when tracing this pattern.  There is a brand of pens called "frixion" and the idea is that friction (rubbing with the other end of the pen) erases the line.  However it seems heat does the same thing so all you need is an iron on low heat (no steam) to get rid of the pen.  So I tried it with the frixion highlighter and it was great!  I could highlight each piece, trace it, iron it to remove the highlighter and then do the next piece, making it so much easier to trace.


.. and I made the bag too.  Back in 2012 - it was in this post here and I love it and was lucky enough to find shoes that match.


Ciao kittens... sorry about the intermittent posting, it's been a busy time... I am sure you all understand that. 

Sunday, July 17, 2016

Replicating a RTW top - Burdastyle 11/2011-114

A flashback to 2009...


I blogged about this skirt in 2009, but it is the top I wanted to show you.  I loved this top and wore it heaps.  It was a RTW top and wore out eventually but I have been wanting to make another like it.  I have been making New Look 6150 and it is a great pattern for this style of surplice top, but recently I spotted this Burdastyle pattern - 11/2011-114A.  The photo on the model doesn't look exactly like this top but the line diagram does and when I checked the reviews the neckline did sit more like the line diagram.  

Bingo!  I found the pattern I have been looking for!

I actually had in stash a fine knit in a dark brown which is really lovely and soft and I remember it was bought on sale but I am not quite sure where from.  I had bought heaps of it as it was quite cheap and I remember thinking I might make a drop pocket Jalie cardigan from it (which is a great pattern, but a fabric hog).  

So the sewing gods were smiling on me to find a piece of fabric so similar in colour to my old top, in the right fabric for the pattern and to have enough of it!  

The pattern is the illustrated sewing lesson so had great instructions and I actually learnt a new technique for thread marking lines.  I have used tailors tacks for dots before but had not come across this technique for lines.  You use doubled sewing thread and long running stitches  to sew through both fabric and pattern tissue, along the lines, leaving a thread loop about 2cm (3/4") high, after each stitch.  Then you cut the centres of all thread loops and carefully remove the tissue.  You end up with a lovely dashed line of thread on one side and the feathery tails on the other side.  Worked really well, especially for this fine knit fabric.


The only alterations I made to the pattern were to not add hem allowances on the body and sleeves.  This top is meant to be long but that would have been way too long on me.


The front pieces are interesting as they wrap to the back and form a yoke which is sewn to the back piece so there is no shoulder seams.  You get an interesting back neckline too.


I am really happy to have this great basic back in the wardrobe and in such a lovely fabric!  I think I may have to look for fabric to make another one.

Oh! and the sewing gods... they really were smiling on me.  I used a bobbin that was partially used of brown thread and this was how much thread was left after I finished the whole top. 


Ciao for now, kittens!

Wednesday, July 13, 2016

More winter sewing - Paprika Patterns Jasper Sweater

I was not very happy with my winter wardrobe last year so have been spending my sewing time trying to add pieces, that I love, that are warm and suit my lifestyle.  This latest piece is a winner on all those fronts.  I have made the collared version of the Paprika Patterns Jasper Sweater before for the Pattern Review sweater knit contest (review here). 

This pattern is not really intended for a sweater knit and it did work but I must say, making it in a fabric more suited to the pattern has had much more success... who would have guessed?! 


The fabric is a french terry knit which has merino in it bought from The Fabric Store last winter.  Looking in the online store, they seem to call it  loop backed sweatshirting.  I did find a fault in the fabric when I was preparing it but had heaps of fabric so it wasn't an issue.  I think when I bought it it was noticed and they gave me extra, as I don't think I would have bought such a long length as I had.


I made the version with the hoodie as I am really loving hoodies in this cold weather and starting to really understand their attraction.  This time I left the body length as per the pattern and shortened the sleeves by about 1/2 an inch.   

The only other change I made was to line the hood.  I tried the suggestion in the pattern to overlock the seams and top stitch, but my overlocking thread is a green darker than the fabric colour and I didn't think it looked neat.  Luckily I had plenty of fabric to cut two more hood pieces.  I inserted the lining by hand which gave a neat finish to the hood and covered all the visible seams.  There is probably a way to do it by machine, but this worked so all good.  I also hand picked a few spots along the hood seam in the ditch to hold the inner and outer hood together.


I used another cute striped fabric for the pocket lining as I love little hidden contrasts.  This fabric is from Crafty Mamas and is great quality.  I made this top from it in 2014 and it is wearing really well. 


Pocket lining
Lovely details in this pattern and there are tutorials on-line for all the the more complex parts, like the welt pockets, hoodie, etc (they can be found by scrolling down to the bottom of the pattern page.)


Details (bottom band not added at this stage)

Well I haven't taken this sweater off since I finished it.  Total love and think I have hit the trifecta... pattern- fabric- colour that all works for me.

Ciao kittens - I hope those of you living through this bitter winter weather are keeping warm!

Friday, July 8, 2016

Burdastyle 11/2012-128 Sweater

My latest make is a sweater from Burdastyle magazine 11/2012-128.


I used a beautiful textured silk cotton knit from Italy, which I bought from Knitwit.

My full review is here.  I made my "regular" size but found it ran a little big, even for a slouchy loose top. I am a bit disappointed at how wide and low the neckline turned out. I probably should have spent a bit more time perfecting the fit before I made it. 

Saying that, I like the style of the neckline and the hem bands. A casual pullover with a bit more style.

I sewed the bias in the neckline a little differently to the instructions. I used a purchased satin bias binding. My order of construction was:

  • sew both shoulder seams
  • sew binding to RS of neckline leaving a little free at the start and end
  • match the free ends to the length required for the rest of the neckband and sew them together using a bias seam
  • press that seam open, then finish sewing the bias to the neckline.
  •  turn binding to the inside and hand stitch the other edge of the binding.


Well saying all that, I still like wearing it and it has been in high rotation since it was made.  I like it for work with a knit pencil skirt and I look forward to wearing it with jeans on the week-end.


And I do have a cowl that fills that open neckline when I have to brave the cold.


I did make a second one.  This one is from a sweaty knit (tracksuit fabric) and I made it a size smaller and totally rejigged the neckline to be narrower and higher.
I made my own binding for this one from some quilting cotton.  I love the little touches.


This is the photo on me when we went away for a very cold week-end at Stanthorpe hoping to see a great frost or perhaps snow... 


No snow but I was warm in my new trackys.  The pants are another pair of Papercut Anima pants in sweatshirt fabric that I made for the week-end too.  I really need to get some cuter sneakers to go with this type of outfit though! 

Ciao kittens...

Monday, June 13, 2016

Stylearc Fay skirt & Burdastyle 09-2012-123 top...

They say imitation is the sincerest form of flattery, I have had this picture pinned for quite awhile. 

It is from Burdastyle 09/2012.  I managed to find a tan merino jersey at The Fabric Store and found among my remnants a piece of black cotton left over from making my son a shirt.  As the merino jersey is so expensive I was reluctant to cut straight into it so I made a muslin from some viscose I had bought cheaply with a piece of nappa leather for the contrast shoulder yokes.  The only adjustment I made to the muslin was to shorten the length by leaving off the hem allowance from the body of the top and the sleeves.  

Sewing the viscose to the nappa leather was not the happiest sewing experience I have ever had but I persevered as I liked the colours and thought I might score a wearable top from this muslin.

It looks pretty good on Diana and I would have used it but it fit me really badly in the back... The button would do up but the slit bulged with the strain.  There was also pulling at waist level.


I did a bit of reading on adjusting for a broad back and the recommendation is to adjust at a line from the shoulder down and then put a small dart in at the back shoulder. The books recommend not to adjust at the centre back as it will make the neck opening larger.   I decided to ignore the advice in this case and added my width to the CB by cutting the back piece 1" in from the fold line (and similarly for the back facing piece).  Making the neck opening larger meant that I did not need the back neckline slit with button.  I thought this was quite a win actually.

Thankfully it worked pretty well and this was my end result.


I love the subtle circles in the shoulder yoke fabric...


I didn't make the skirt from the same issue but was definitely influenced by it.  I had a beautiful piece of stretch jacquard from the Fabric Collection and had planned to make a Collete Mabel, but ended up making the Stylearc Fay skirt instead after seeing it a few times in Sew Jean Margaret's memeademay posts.

I have only made it once before and hardly ever wear it as I feel it is too long for me. Amazingly I can still fit the skirt as the fabric was a rayon and very stretchy, but I knew I should go up in size as I am not as slim as I was back then.    The Fay skirt has the fabric doubled in it with a bagged hem.  I did not want to double this thicker fabric so I chose my length and folded the pattern at that point.  I cut the pattern with 1" side seams and pegged the bottom of the hem slightly following the lines of the Fay skirt pattern.

I also used my own method of inserting the elastic.  This is such a simple skirt but I really love it.  I think this will be my new TNT stretch pencil skirt pattern. 

Champ photo bombing!
I really love this outfit but the photos do make me look very crumpled.  The hem on the tee is a bit wavy.  I am  hoping this will settle after it is washed.  Any tips on avoiding the wavy hem would be most appreciated!

The weather was dingy and dark so I turned on the lights and I think it has exaggerated the wrinkles in the top.
I like how it goes with my Jalie vest too...


Ciao kittens... I am officially caught up with my current sewing, so we shall see what hits the cutting table next.