Saturday, October 17, 2020

PR Wardrobe Contest - item 3 of 10 - StyleArc Vicki top

Third piece in the wardrobe contest - a lovely summery swing top - the StyleArc Vicki top.

I cut my usual StyleArc size 16 and am very happy with the fit.  The fabric is a rayon crepe (I think) and acted like every seam was on the bias so a bit painful to sew but it suits this top.


My notes on this make:

  • I lengthened the top by 3" at the hemline.
  • I topstitched the seam where the front joins the back to emphasize it.
  • My binding is turned completely to the inside and sewn down with the result that no binding shows. I did this as I was not going to get a good finish with the described binding method. I think I would need to cut the binding slightly wider to achieve that finish (at least with this fabric). However I am very happy with the finish as I have sewn it and would probably do it again like that.
  • I did not follow the suggestion of sewing a bar tack to hold the seam open at the top of the centre front seam as it would have stood out on this single colour fabric. I just did a hand tack inside at the neckline to hold the seam open.


I love this style and really want to make a ton of these tops!  So I think this pattern will get a workout in the future!

I am currently making piece 4 which is the Stylearc Charlie skirt.  I love sewing the top stitching but am a bit nervous about how a slimline skirt in a stretch woven will fit/look on my self, but hope to finish it soon! 

Wednesday, October 7, 2020

PR Wardrobe contest - Piece 2 of 10 - New Look 6212

I have finally finished my second item for the wardrobe contest.  New Look 6212.  I have made this one before - here

This one took some time to get sewn.  The things that took time were - 

...playing pattern tetris to layout it out on my fabric, 

... those pleats!

...and the beautiful Liberty fabric is really unforgiving so putting in the sleeves meant the quick unpick came out a few times.

I am not going to outline all the details here but you can read more in my review here, if you are interested to know.


Ciao for now, kittens!


Saturday, September 26, 2020

#SewVintageSeptember - Simplicity 6804 - 1985 blouse sewing pattern PART 3

I have finally got my modelled photos of the blouse I made for #SewVintageSpetember.  It is Spring here and we have had some lovely days and today when I planned to wear my new top to get photos it is cold and blustery and winter is back!  So the photoshoot was done and then back into winter clothes afterwards. (boo!)

So not many words but photos ...


The obligatory shot of the back (with the wind whipping up my hair!)


Tea anyone?


Ciao for now...

Thursday, September 17, 2020

PR Wardrobe Contest 2020 - Piece 1 0f 10 - The StyleArc Richie Knit Tunic Dress

I decided to start with a relatively simple sew to get some momentum going.  Nothing like a finished item to make you feel you are going to make it to the end! 
 
The StyleArc Richie dress in a jersey purchased from Spotties recently.  I had planned to use a pretty aqua rib knit picked up from a bargain table, but the fabric was narrow so the pieces would not fit no matter how much I tried.  The fabric I ended using is this one.


It was on a 30% sale and I would call it denim coloured rather than navy.  It feels like it will be quite hard wearing but has a soft cottony feel on the inside.  The pattern only called for 1.25m but I bought 1.4m so had enough wriggle room even with lengthening the dress a little.  It curls like the dickens so a lot of pinning and then sewing on the sewing machine before overlocking.  

Their is an option for a chest pocket and I decided to add it as the fabric/ dress combo could be very plain otherwise and decided to add a further bit of bling by cutting some heat transfer vinyl on my Cricut machine into a heart shape with the words be kind, a good thought to use on this dress made during Covid times.


Neckline...


For the moment it will be only shots on Diana but as the contest gets toward the end I hope to do a modelled photo shoot of all the pieces.

Frock...

Ciao for now!...

Monday, September 14, 2020

PR 2020 Wardrobe Contest - Part 1 - The plan!

I had started planning a new wardrobe to sew for Spring / Summer when I saw that Pattern Review are hosting a 10 piece wardrobe contest.  I took the plan I was putting together and used it as a basis to fit in with the Contest rules.

The official rules are:

1 -Sew 10 unique garments during the contest period. The garments must be as follows:
Make 1 Topper
Make 2 Bottoms
Make 2 Tops
Make 1 sewn accessory 
Make 4 Free choice (top, bottoms, topper, maximum of 2 dresses or 2 jumpsuits or 1 of each, maximum of one additional accessory)

2 – All of the items must form a cohesive wardrobe.

It took a bit of thought and planning but over a few days this is the plan that came out.


Some of these patterns I have sewn before and others are new to me.

The fabrics are mostly from stash.  I did buy some fabric to make the bag (that's the blob in the top row!)  Some are remnant pieces so I may have to sub other fabrics in if there is not enough.

The photo below shows on the top the knit fabric for the cardigan. The next row are the fabrics for my three tops  (Liberty print, blue rayon crepe and a floral print rayon) 
and the last row are the bottoms (denim-look bengaline, light beige ponte and dark brown bengaline).


In this photo is the topper fabric again with the two dress fabrics.


I know things are going to change as I go along.  I have just noticed the aqua fabric for the Style Arc Richie tunic is quite a narrow cut so it may be the first one subbed out.  At the moment I am preparing the pdf patterns (cutting and sticking).  The contest starts on the 17th so more mad sewing to happen soon...

Anyone else considering joining in or sewing along?

Friday, September 11, 2020

#SewVintageSeptember - Simplicity 6804 - 1985 blouse sewing pattern PART 2

 I have finished the 1985 vintage blouse started last post - Simplicity 6804 from 1985.

Notes on the make - 

  • I made it two sizes smaller than the pattern sizing indicated on the pattern.  No finished measurements were given on the pattern so I flat measured at bust height and determined my preferred size from that.
  • I shortened the pattern by 3 inches.
  • I didn't love the way the shirt tail hem was finished.  Front and back finished separately then side seams sewn.  To get it all to match you need to mark the start of the side seam / start of the hem curve better than I did.  I had to fudge it a bit.
Other than that I am pretty happy with it and of course the weather has got too cool to want to wear a short sleeve blouse so modelled photos will come later.

So not much more to say, here are the photos...


Front shoulder yoke gathers...


Back shoulder yoke gathers... gathers for miles...

I did not have green buttons but had fun with the thread instead...

So I live in hope I will get modelled shots some time.  If you are on the hunt for your own vintage pattern or just love looking at them then please check out my Etsy shop for vintage and OOP patterns - SusysSewingEphemera.

I think the Wardrobe Contest on PatternReview.com will be my next sewing challenge...
Ciao for now kittens...

Friday, September 4, 2020

#SewVintageSeptember - Simplicity 6804 - 1985 blouse sewing pattern PART 1

On instagram I happened upon  a new challenge running for September that really caught my attention, SewVintageSeptember.  As I said last post I would love to sew a 1960's vintage frock and my interest in vintage has really piqued since I opened an Etsy shop selling vintage and out of print patterns.

I wanted to be involved but did not have a 60's frock pattern lined up yet so checked though my stash (including my shop) and pulled a pattern from my shop.  It is Simplicity 6804 from 1985.


The description of the pattern reads: Top-stitched shirt gathered to yoke has front button closing and notched collar. V.1 has bias bands on pocket and sleeves. V.2 has pockets and flaps, tunic length. V.3 with shirt tail hem has extended shoulders and long sleeves tapered to wrist. (Wrong side of fabric shows when sleeves are rolled up.)

I had a fabric that reflected the View 1 picture.  A printed polyester bought from Super Cheap Fabrics.


I love playing with a plaid and this pattern has all the grain line markings so you can lay certain pieces on the bias.  I chose to sew View 1 but with View 3's shirt tail hem.


The final bust measurement was not listed on the pattern like I am used to from current patterns, so I flat measured the pattern pieces at bust level to work out how much ease was in the pattern.  Well, as you would expect from this style of 80's pattern, there is heaps of ease.  I did sew my own clothes in the 80's (and bought a lot as I had my first real job) and do remember wearing some very loose / baggy tops but I think that suited me in that era and I was slim so they hung in the right kind of way.  Now that kind of ease is not the look anymore and I am not the young slim girl I was then, I decided to go with less ease and cut the pattern on the line two sizes down from the size indicated by my bust measurement. I also shortened the top by a full 3 inches.

I am taking my time and spent yesterday afternoon cutting and prepping. This afternoon I started sewing and thought I would get further through the make than I did but the pattern has quite a  bit of detail and I am enjoying that.  First up is the pocket.  If you could see a close up of the cover photo of V1. it looks like there is just a bias cut tab only where the pocket is but I realised they had pattern matched the pocket to make that top pocket band stand out.  I do enjoy a good pattern matching challenge!  The fabric being a polyester does not press so well so took me longer to put this together than it should have and it is not as precise as it could have been working with a natural fibre but I am happy with the outcome.

Pinned...


then sewn...


The front and back pieces are both gathered onto the yoke and I considered using the burrito method to make the yoke but with the difficulty of telling front from back in this fabric and with three lots of gathering I decided to use the method used in the pattern which gives an enclosed yoke but requires hand stitching to attach the yoke facing to the shoulder seams.  I am quite happy to hand sew but if you don't like it, look up the burrito method and it can be made entirely with machine sewing while still giving the lovely enclosed yoke finish.

So this is how far I got today...


Obviously I am blogging a current make.  While I did promise to blog some of my recent previous makes, this challenge got me excited and I also wanted to provide more detail while I made this shirt.

I also want to tell you about the sale I am having in my Etsy shop in line with this challenge.  All the vintage clothing patterns are 20% off over this week-end so you can perhaps find a pattern to join the challenge too.  Otherwise please feel free to jump over to my shop link to look at the lovely vintage pattern covers!  I love the cover art of vintage patterns, don't you?

Link to shop - SusysSewingEphemera.etsy.com  I rarely do a sale in this shop so this is your chance to get a bargain and hopefully sew a vintage item too.

Next up I will show the finished shirt, Ciao for now, kittens....

Thursday, August 27, 2020

Pussy bow blouse - Ottobre 05-2015-13

My wardrobe needs more woven tops.  I made a ton of tees a while back but have very few dressier tops. I also do not have enough tops with full length sleeves.  I tend to favour 3/4 sleeves and while they look lovely, they don't work in the middle of a cold, windy winter.

So I went through my Ottobre mags and this is the one I found that appealed to me.  I like the pussy bow as it makes a nice change from a collar.  I also like the soft gathers from the front yoke and the sleeves with a bit of fullness for drama.

In the stash I found a piece of georgette (I think?). It would be a polyester but has a nice drape and weight.  The print is a bit darker than I normally go for but I really liked it when I saw it.  I bought it at East Coast fabrics last year.  The only issue with the busy print is that it is hard to see the details of the bow.

The only alteration I made to the pattern was that I did not make plackets and the narrow buttoned cuffs.  I thought it would be difficult to make the narrow cuff in this fabric so I decided to keep it simple and just sewed a casing at the sleeve-end and inserted narrow elastic.  I quite like the effect.


Pretty proud of the pattern matching across the blouse and the sleeves.

This photo of the shirt was taken before I had made the buttonholes.  I used very small black buttons to blend in with the shirt as I didn't want the buttons to detract from the bow.

The bad news was that my automatic buttonhole failed and would not complete the last return row and last bar tack.  <insert sad face>  So the shirt sat idling while my machine was in the shop (for far too long!)  As the length of the visit away lengthened, I asked a friend if I could use her machine to complete the buttonholes so did end up finishing it and have worn it weekly since then.

I did borrow a sewing machine during this time.  This sewing machine my mother bought in the early 60's.  We cleaned and oiled it and it was quite usable for straight stitch but I could not get the zigzag stitch to balance properly so I am thinking I might take it in for a service soon.  It is really a very fancy machine, which I did not realise when I learned to sew on it when I was 14.  It has all the cogs needed to make a tonne of different stitches and will wind a bobbin while you keep sewing!


I have downloaded the manual for this machine as the manual that my Mum gave me was for a slightly different model.  If I spend some time going through that I might get the stitch balance fixed.

I have a dream to make a frock for myself from a 60's pattern.  A 1960's machine and a 1960s pattern for this 1960's baby.  I like it.  

Ciao kittens, more soon...


Wednesday, August 19, 2020

Rhapsody Dress Love

I am going to make a concerted effort to get into blogging again as I have been getting into clothes sewing again.  My clothes sewing was in the doldrums a bit as I put on a bunch of weight and was having trouble working out what worked for me now.  I have been dabbling with mixed results but think I am getting into the swing of it again.  So for now I am catching up and will apologise in advance as the photos mostly will be on my dressmaking dummy.  I plan to try and get more modelled shots later but did not want to have that delay me up from blogging about my makes.

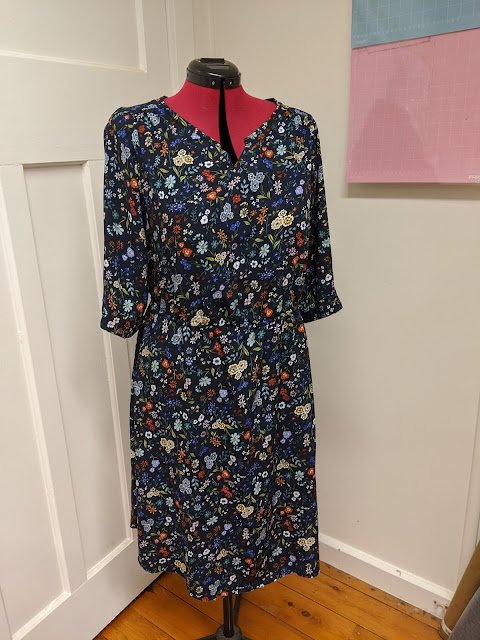
In my last post I made the revised Rhapsody blouse which I still love (but haven't worn much as it has been too cold for it).  I wanted to put an entry into my QCWA Division's dressmaking contest (been a member for a bit over a year), so I thought the Rhapsody dress would be perfect because of all the great details - concealed yoke,  french seams, narrow binding, cuffs, etc.... It needed to be a complete outfit and I did not have a lot of time so decided a dress would be more time efficient than two seperate pieces.  I used a rayon I had bought from Spotlight recently when it was on sale.  The fabric is lovely with a sweet floral print but has a dark background so it is a bit hard to see all the details easily.  This is the finished product.

3/4 cuffed sleeves, No ties option


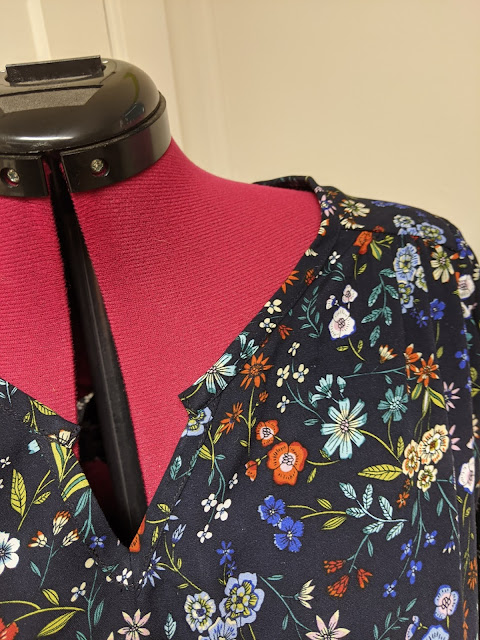
Front neckline binding


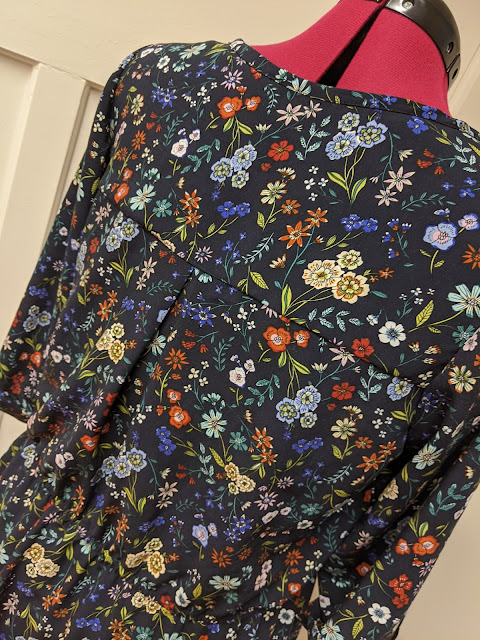
Back yoke with pleat

Oh, and I am super proud to say that I did win at Division level in the Smart Casual Garment section.

Sadly though because of Covid, the State level of competition will not be proceeding but it may get displayed at an upcoming showcase of the competitions we hold.  This dress has not been worn yet but I look forward to wearing it when the weather warms up.  

Ciao kittens, more makes real soon....

Monday, May 4, 2020

The newest Love Notions Rhapsody top

I just have to share my latest make.  This is my second time making this top and I like the first version I made but was not sure if I should have sized up a little.  This time I downloaded the re-jigged version of the top and used the full bust piece which is provided with the pattern.  I am on the borderline of needing it going by the sizing and I am very happy I decided to try it.


The fabric is a lovely cotton, maybe a voile? but it has slight crinkle in it.  It behaved very well under the machine and I love the pretty print.  I bought it a few years ago at Russells Fabrics at Sandgate.


My tips with this pattern 
  • Note the size printed on your pattern somewhere, as you can't tell what size you have if you have the other layers turned off and you cut the pattern on your size line.  The size is incorporated into that line.
  • I made the bishop sleeve at 3/4 length (a new option) and the elastic measurement would have been too small for me.  I think it may be the elastic size for the original long sleeve option.  I added 2" and cut my elastic at 12".
  • I put the binding on (I think) the opposite way to that shown on the pattern.  I sew the RS of the binding to the inside of the neckline and then flip to the front and top stitch.  I had the impression in the pattern they start at the outside and flip to the back.

I love all the details in this sew.  It has a burrito lined yoke, french seams and gathering at the front shoulder yoke seam.  The explanations in the pattern are excellent and they encourage you to read the pattern on your computer or tablet rather than print it out as they have hyperlinks that move you to the section needed next.  The only thing I don't like about this is I can't write notes onto the pattern for how I did things.

I hope you are all staying safe in this COVID time and getting lots of sewing, crafting and cooking accomplished!  

Ciao Kittens!